Many women searches for "how to apply correct makeup", learn step by step applying makeup guide for FREE .
Step1 . Cleansing Skin cleansing is an important part of skin care routine. Cleansing creams goes deeper into the pores and clean them thoroughly and is an integral part of treatment for multiple chemical sensitivity, pesticide and chemical exposure as well as therapy for chronic fatigue syndrome.
Look for a cleanser that suits your skin type. Check a product label for descriptive terms: Words such as strong and potent indicate a high powered formula good for oilier skins, while words such as gently and mild hint at products suitable for drier complexions.
Liquid and Cream Cleansers
Liquid cleansers are sometimes called cleansing milks, cleansing lotions or gels and have the consistency of thin to moderately thick body lotion. To apply, spread a small amount over dry or damp skin then wipe off with a damp face cloth or rinse off with lukewarm water.
Skin cleansing Tips
Drink 8-12 glass of water a day as this is good for healthy skin.
complexion bars look like soap, but they are actually mild cleansers in bar form. Look for individual formulas targeting oily, normal or dry complexion.
Follow the skin cleansing routine regularly
Sebum production speeds up in the summer which contributes to grimy summer skin. You may want to sneak in an extra daily cleansing during warm weather.
Do not spend money on expensive skin cleansers, because a cleanser is going to be on your skin for only a few seconds before being rinsed away. Save your beauty cash for moisturizers, sunscreens, intensive treatments and other products that will sit on your skin for a while.
Homemade Rose Water Cleansing Cream
Galen, a Greek physician of the 2nd century, made this cleansing cream with the following ingredients:
1 tablespoon beeswax or white paraffin wax
1 tablespoon emulsifying wax
4 tablespoons mineral oil
6 tablespoons rose water t teaspoon borax, and
a few drops of rose oil (perfume)
Melt the waxes and oil together, and at the same time heat the water and borax and make sure that the borax is completely dissolved. Remove both bowls from the heat and pour water into the oiL Continue stirring until a white cream starts to form. Add a few drops of rose oil when the mixture begins to cool. Carry on beating until tbe mixture thickens.
Step2. Applying foundation Many women avoid wearing foundation because they are scared of an unnatural mask-like effect. The foundation market today is saturated with many types and brands of foundations. Foundation is the cosmetic product that women pay the most attention to. And remember, foundation is one of those products you wear every day, so making the right investment at the beginning will pay off. There are two keys to applying foundation - the first is to choose the perfect foundation shade and the second is to pick the right formulation for your skin.
Choosing foundation type
The reason for applying foundation is to get a smooth and even finish to your skin. Liquid foundation is most commonly used because it is easy to apply. However, compact foundations are excellent alternatives as they give an even finish, which doesn't have to be set with powder.
Types of Foundations
Tinted Moisturizers - These are a a cross between a moisturizer and a foundation, as they will soothe your skin while giving a little coverage. They are ideal for young or clear skins. Unlike other foundations, you can blend tinted moisturizers on with your fingertips.
Liquid Foundations - These suit all but the driest skins. If you have oily skin, look for an oil-free liquid foundation to cover affected areas without aggravating them.
Cream Foundations - These are thick , rich and moisturizing, making them ideal for dry or mature skins. They have a fairy heavy texture, so blend them well into your skin with a damp cosmetic sponge.
Mousse Foundation - Again these are quite moisturizing and ideal for drier skins. To apply, dab a little onto the back of your hand, then dot onto your skin with a sponge.
Compact Foundation - These are all-in-one formulations, which already contain powder. They come in a compact, usually with their own sponge for application.
Stick Foundation - These are the original foundation, dating back to the early days of hollywood. They are best confined for use on badly blemished skin.
HOW TO APPLY FOUNDATION
Foundation is always applied downwards, to minimize the impact of facial hair.
- Take out a small blob of foundation on the palm of your hand. As foundation dries up fast, dot foundation section by section on the face.
- Start by dotting on the forehead and blend well with a damp sponge on fingers before moving on.
- Now do it on your cheeks, then chin, nose and upper neck.
You may dilute the foundation by adding some astringent, toner or even water to make it sheer enough to let your skin show through. It looks more natural if applied like this.
HOW TO BUY FOUNDATION
Test foundation on the inside of the forearm-skin tone is closest to neck colour there, because it's protected from UV damage. Makeup should blend with the skin colour of the neck, not the face. If any doubt then buy one shade lighter than your facial skin tone. Don't make up your mind instantly. It takes about a minute for colour to dry and interact with the chemicals in your skin. The red pigments develop first so it will appear the pinkest at the beginning. Then go to the nearest source of natural light. (Even the most flattering uplift cosmetics hall tends to have colour-distorting fluorescent lighting.) If you have chosen the right colour, it will disappear into the skin.
Step3.
Applying concealer Concealers come in shades to match every skin tone. Choose a makeup concealer that is lightweight yet creamy. A stick concealer provides direct on-the-spot application. A quality concealer is texture-free, virtually invisible and vitamin-enriched. The best concealer will brighten and lighten dark areas, erase spots and even out skin tones.
Quality concealers make skin flaw-free. Most concealers, including under eye concealers, can be used under foundation or on their own. Find a concealer that is water-resistant, fragrance-free and non-comedogenic.
Use Of Under-Eye Concealers:
Concealers are applied to cover dark circles around the eyes, thereby grweatly enhancing the appearance of the face.They are matched to the skin tone and are applied before using the harmony foundation. Concealers come in shades to match every skin tone.
HOW TO APPLY CONCEALERS
1. In applying concealers, using the right makeup techniques is important. Concealers are of a denser composition than regular foundations and are generally available in sticks, tubes, pots, and creams. Concealers can be used to cover blemishes, dark spots, ruddy areas, marks, veins, freckles or under eye circles.
2. Your concealer should be one shade lighter than your foundation (and only in extreme cases should you use a concealer two shades lighter).
3. Using a concealer that is too light or too pink will give the appearance of `owl eyes'. In other words, it will emphasize the dark area instead of concealing it.
4. Apply concealer with a small fine tipped brush for an accurate application. As with any other application, blending is the key.
5. Always set your concealer with a sheer, translucent powder to prevent creasing.
Step4.
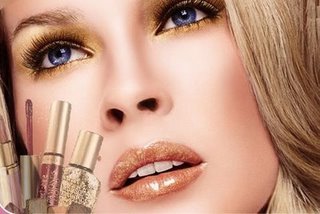
Applying eye shadow Eyeshadows are certainly eye catching on the entire face. It is like fun to experiment with eye shadows, eye liners, pencils, paints,and powders but most women just want to know what is right for them. Always choose neutral colours for eyeshadow to subtly enhance your looks, or play with kaleidoscope of different shades to contrast with and dramatize your colouring. For those wishing to make their eyes the focal point of attention, eye shadows, eyebrow gels, eyeliners in the right style can do the trick. Follow below given steps on how to apply eye shadow. If you have brown eyes have a look at the selection of Eye Shadow for Brown Eyes
How to Apply Eyeshadow
1. The first rule when applying eye shadow is to blend it well so there are no harsh edges. Put the very light shade (high lighter) on the space beneath the brows up to the crease of the eye lid.
2. Apply the medium shade on the upper eyelid only. Use a lighter shade under the browbone to highlight the eyes.
3. And the darkest shade on the crease of the eyelid that is the place almost in the middle of the total eye area-above the lashes and beneath the brows. Blend both the colors well.
4. With the tip of a fine brush, apply a little shadow beneath the eyes, along the lower lash line. Smudge it lightly to give your eyes a subtle, glamorous look.
Applying Eyeshadow Tip submitted by Pav
Purple eyeshadows tend to look stunning on brown eyes as does green on hazel eyes, gold on green eyes, and for blue eyes use a blue eyeshadow in a lighter shade than your eye colour.
Eye Shadow Kit and Colour Choice
Your eye shadow kit may contain 3 shadows-a very light shade (vanilla, very pale pink, beige, silver grey etc) which is the high lighter and which gives a light shimmer on the brow bone and highlights it. The box has two more shades of the same color. Light base shadows in pale pink, yellow, cream or beige look good on small eyes; spread over the entire lid with a touch of dark shadow in the outer corners, these accent the eyes.
Apart from colour, there is a choice of forms of the eye shadows. You can choose from pressed powders, pencils, sticks, gels, crayons and creams. Pressed powders are still the most popular form of shadows, because they are the easiest to apply and control. These are available in pearly and matt textures. The effect is not long lasting, but if you apply them with a wet brush, you can get a deeper effect and increase the staying qualities of the colour.
Powder and Cream Eyeshadows
Powder Eyeshadow: This is the most popular type. These come in pressed cakes of powder either with a small brush or a sponge applicator. You can build up their density from barely there to dramatic. Apply using a damp brush or sponge if you want a deep colour for an evening look.
Cream Shadows: These are oil based and come in little pots or compacts. They are applied either with a brush or your fingertips. They are a good choice for dry skins that need extra moisturizing.
Stick Shadows and Liquid Eye Shadow
Wax based, you smooth these onto your eyelids from the stick. Ensure they have a creamy texture before you buy them, so they would not drag at your skin. Usually Liquid eyeshadow come in a slim bottle with a sponge applicator. Look for the cream-to-powder ones that smooth on as a liquid and blend to a velvety powder finish.
Picking Your Eye shadow Colors
- Eye shadow colors matched with skin tone, eye color and hair color is what makeup experts recommend and neutral looks good on everyone.
- The first step towards applying any eye makeup is to pat some powder onto the eyelids to matte them and keep the powder eye shadow from creasing. If using cream eye shadow, this can be skipped as creams will clump and clog with the dry powder.
- Eye shadows need to coordinate with eyes and hair, not than clothes. Browns, lavenders are best for blue-eyed, blonde haired women as well as light brown eyed-ladies. Smoky grays, bronzed pinks and silver toned peaches look good on women with green or black eyes.
Eyeshadows Makeup Tip Suggested by Visitors
Try applying an eyeshadow that matches your skin tone. Apply to the lid all the way up to the eyebrow. Then apply a walnut colored eyeliner on the top lid, then smudge. Put on a dark brown mascara. You will look sophisticated, but very natural.
NEVER wear red eyeshadow if you are a blue-eyed blonde. It seriously makes you look like da devil. Or the American flag which is worse. By Edward
Step5.
Applying eye liner Eyeliner is a great way to flatter all eye shapes and sizes. Eyeliner should be applied after eyeshadow and before your mascara. An eyeliner adds depth and definition to the eyes, making them more dramatic and expressive. The earlier cake type of eye liner has now been somewhat replaced by liquids and pencils. The liquid liners are sold in bottles either with a separate small brush or in an automatic unit with the brush built into the cap. Eyeliner is applied for emphasizing eye shape and accentuating the lash line.
Eye liner comes in two forms - Liquid and pencil eyeliner.
Liquid Eyeliners - These have a fuild consistency and usually come with a brush attached to the cap. However, these are not as easy to apply as the ink-well sponge-tipped variety. To apply liner, look down into your mirror to prevent the liquid smudging. You should stay like this for a few seconds after applying the liner to give it time to dry thoroughly.
Pencil Eyeliner - This is the easiest way to add extra emphasis to your eyes. A pencil should be used to draw a line close to your upper and lower lashes. It is a good idea to sharpen the pencil between uses, not only to ensure you have a fine tip with which to work, but laos to keep it bacteria free. Alternatively look for eyeliner pencils that come with a smudger built in at the other end.
Steps for Applying Eye liner
First apply eye shadow , then move on to apply eyeliner. If you have never applied liner before and feel a bit nervous, try this technique. Sit down at a table in a good light with a mirror. Take your good eyeliner in your hand and rest your elbow on the table to keep your arm and hand steady. You can also give yourself extra support by resting your little finger on your cheek. These are some tips and instructions for applying eyeliner properly.
- Choose an eyeliner appropriate for your eye color.
- Draw a thin line, try to draw as close to the base of your eyelids as possible. Start from the inside corner of your eye and work your way out.
- Tilt your head back slightly and bring your eyes to a half-open state. This creates a good angle for application, while allowing you to see what you're doing.
- Experiment with lining the bottom of your eyes the same way for a more dramatic look. When lining your bottom lids, go in the opposite direction: start from the outside corner and work your way in.
Types of Eyeliners and application tips
- Pencil eyeliners: offer good consistency and are relatively easy to use. These can be testing by drawing with them on the back of the hand and ensuring that the pencil does not tug at the skin or leave thick globs. For a soft look, the pencil liner applied in a thin line over the natural lash line can be smudged with the fingertip or with a damp makeup brush to give the appearance of a dark shadow.
- Liquid eyeliners: Take practice and a steady hand to apply, but are sure to give a smooth, sensuous line to the length of the eye. They are generally limited to the top of the eyelashes, whereas an eye shadow or an eye lining pencil may be used under the lower lashes also. Usually sold in bottles with an application brush, one must allow the liquid eyeliner to dry before opening the eyes to avoid smudging.
- Permanent eyeliners: are comparatively more expensive and exclusive options, created through cosmetic surgery by micro pigmentation. This technique adds a defined line to the lid using a handheld device that punctures the skin several times a minute with a very thin needle to push color pigments to the desired position.
- Cake eyeliners: are applied with water on the top and bottom of the eyelid. For applying pencil and cake eyeliners, it is important to face a mirror with good lighting overhead and hold the head back while pulling the skin on the eyelids tight. This makes it easier to control the application of the eyeliner.
Eye makeup tips and techniques for Eyeliners
- The purpose of an eyeliner is to make eyelashes look thicker and a dark liquid one highlights the shape of the eyes and deepens the look.
- Lining under the eyes is recommended only for those with big eyes, as it tends to make the eyes appear smaller.
- For using pencil eyeliners, it is best to softly draw a thin line along lashes, next to roots. For a party look, the color can be lightly dotted along the lower lashes and for demure looks, the line be softly smudged with fingertip or a Q-tip.
- Wash your eyebrow makeup brushes regularly with makeup remover or a mild gel shampoo.
- never apply eyeliner if your eyes are tired or infected
- Do not apply thick eyeliner to small or close-set eyes.
- Color of the eyeliner should be same as the the color of the mascara.
Step6. Applying eye mascara Mascara adds a flattering fringe to your eyes - particularly if your lashes are fair. Applying Mascara is the final step in eye makeup. Mascara is applied on the eye lashes to beautify them. Different formulas and application of mascara can enhance your lashes in different ways. To make the eyes alluring, the use of the right eye makeup product using the correct technique is very important. For eye-popping appeal to this focal point of the face, the basic idea is to use complementary colors. Mascara adds volume and length to the lashes and make your eyes appear brighter and more beautiful.
How to Apply Mascara
Are you looking for "how to apply mascara"? Here are some tips for you..
Start by applying mascara to your upper lashes first. Brush them downwards to start with, then brush your lashes upwards from underneath. Use a tiny zig-zag movement to prevent mascara from clogging on your lashes.
Next, use the tip of the mascara wand to brush your lowe lashes, using a gentle side to side technique. Take care to keep your hand steady whilst you are applying the mascara and not to blink while the mascara is still wet. Comb through your lashes with an eyelash comb to remove any excess the wand has left behind.
Tips for applying eye mascara
- Select a suitable color. If you have blond or red lashes then go for brown mascara. Darker-lashed women can consider brown for a casual look, and black or brown-black for more pronounced or dramatic lashes.
- Before applying mascara curl the lashes to widen the eyes. Prior to your mascara, Curl your lashes with an eyelash curler and apply all other eye makeup.
- Begin with the underside of your upper eye lashes and then moving the brush slowly upward toward the tips of your lashes.
- Wait for a minute for them to dry, and similarly apply a second coat. Let the first coat dry completely, then apply the second coat. Two thin coats look more natural than one thick coat.
- Finally brush with a clean dry brush, to separate the lashes.
Selection of eyeliner shades
- For women with blue eyes, eyeliners in brown and rose tones contrast the blue of the eyes, making them appear more vibrant. Green eyes, on the other hand, brighten up with violet shades that give a dramatic look for evenings or stage makeup and look great in photographs. A mocha shade is a subtle, everyday look for all eye colors but especially brown eyes, which also give a smoldering look when green and gold eyeliners are used.
- Neutral shades in eyeliners are charcoal, black, and chocolate, good for all eye colors, except those with small eyes would do well to avoid these, as they tend to make eyes appear smaller. Thus, it is preferable to restrict dark eyeliner colors to the crease of the eye and highlight the brow bone with a light shade.
- All eye shadows need to complement the eye and hair-color of the person and a bit of powder dusted on the eyelid prepares the eyeliner to set well and intensify the eyes.
How to remove eye mascara
Mascara must be removed very carefully to avoid damaging the delicate skin around the eyes. While removing the mascara from eyes always avoid the colour from going onto the delicate area below the bottom lashes and close your eyes. Roll a cotton bud dipped in a cosmetic cleanser over the lashes, taking the mascara down onto the tissue. Repeat this till all the mascara is gone.
Step7. Applying powder When it comes to powder, there is quite a variety to choose from. Makeup powder is the one important ingredient that goes into the durable setting given to poised, cosmetic charm and makes for long lasting makeup wear. Makeup powder can help makeup stay in place, give a shine-free, even finish to the eye, cheek, lip or cream products used and also provides a quick touch up-tactic for the skin tone. It is a versatile makeup product that is every photographer's delight and helps to give natural, even-toned look to faces in artificial or natural lighting, highlighting distinctive features and downplaying not so attractive ones.
There are two types of makeup powders:
- Loose Powder - Loose powder has a light, airy consistency and is preferred by professional make-up artists because it's less likely to streak on the skin. This type of powder gives your face a very smooth, matt look and lasts longer than pressed powders.
- Pressed Powder - Pressed powder is treated under great pressure to create a compact, cake form. Oils are often added to the formula to ensure that the powder sticks together longer, but this can make the product streak on your face
Beauty benefits of makeup powder
- Many women like to carry pressed powder for a middle of the afternoon makeup touching up, be it at the office or out in the market. When applying party makeup, experts advise that post blending in of foundation and concealer, the face benefits from a feather-light dusting of a loose layer of makeup powder over the entire face and eyelids.
- The application of makeup powder calls for a clean, large, fluffy and rounded makeup brush that helps casually dust loose powder and give a natural, even toned finish to the face.
- A brush is a better bet for applying makeup powder as opposed to using a sponge or powder puff as these put too much powder onto the face.
- The right way of dusting makeup powder is to touch the full end of the brush into the loose powder, knock off the excess and brush it on using the same up and down motion used for applying foundation.
- Makeup powder eliminates the excessive shine to a face and needs to be applied more liberally when combined with the use of a sunscreen, as a thorough application is necessary for adequate sun protection and non-greasy feel.
- Makeup powder must always be applied after the foundation and concealer has been finely blended in but before applying eye makeup.
- The same shade of makeup powder in a pressed compact is a easy touch up tool for women on the move and a small amount of powder on a cosmetic puff, applied to shiny areas where makeup has thinned, offers great coverage.
Step8.
Applying blush Give your complexion a bloom of colour with this indispensable beauty aid - blush. Apply foundation, eye color and lipstick and then apply blusher as Blush should be your last makeup step. Nothing brings a dull, drowsy face to life faster than a quick sweep of blush. "You put blush on, and you look instantly prettier, fresher and less tired," says makeup guru Bobbi Brown. Decide the color of blush you want to apply on your cheeks. Read useful advice from makeup professional on how to apply blusher.
How to Apply Blush
- First choose the color that resembles the natural glow of your cheeks after you exercise.
- Determine your face shape: are you oval, heart, round, long or square? Knowing this helps you determine where it's best to apply the blush.
- Complete the application of foundation, powder and all eye makeup before applying blush.
- Put the blush on your brush, tapping off any excess or put a dab of gel on your fingers.
- Look in the mirror and smile
- Sweep color in an arc following the line of your cheekbone up from the apple of your cheek to your hairline. Keep color light & blended.
- Blend a little blush down your cheek for a little more natural, less dramatic look.
Tips for applying blusher
For a sun-kissed sheen: dab a small bit of bronzer powder on your forehead, chin & nose. Make sure it doesn't look like a stripe.
Make sure to blend makeup into your jawline and hairline so it looks more natural. Also try using a brush instead of those square sponge things or your face will look to cakey.
- never mix blusher powder with other makeup creams
- a color that is close to or lighter than your lipstick will work best
- use apricot shades on pale skin and dusty roses on darker skin
- if your skin is oily, a powder brush will last longer
- always dip the brush quickly and flick your wrist to stroke the cheek lightly
- never apply blusher on the nose for corrective purposes
- never apply too much blusher otherwise your face will look as a mask
- dab a little shimmery blush on the highest point of your cheekbone nearest your eye to create a more distinct look
Powder Blush
This should be applied over the top of your foundation and face powder. To apply powder blusher, dust over the compact with a large soft brush. If you have taken too much onto your brush, tap the handle on the back of your hand to remove the excess. It is better to waste a little than applying too much!
Cream Blusher
Cream blusher is applied with your fingertips, after foundation, but before face powder. To apply, dab a few dots over your cheeks, from the plump part up towards your cheekbone. Using your fingertips, blend well. Build up the effect gradually, adding more blusher to create just the look you want.
Colour Choice for Blusher
There is always a kaleidoscope of blusher shades to choose from. However, as a general rule, it is best to opt for a shade that tones well with your skin colouring and co-ordinates with the rest of your skin colouring and makeup.
Step9. Applying lipstick Lipstick has been around for about 5000 years! It is the earliest and quickest way to give your face a focus and create an instant splash of colour. To apply lipstick properly, it is important to have the right tools handy for the best application of lip makeup and get the setting right, in sync with the occasion. The first step is to choose the best shade of lipstick according to the skin tone. Like the colors of rainbow, there are shades of virtually every color when it comes to coloring your lips. With a lighter complexion, the lipstick is used more to subjugate your skin tone. Lighter shades make a fair complexion seems paler and dull. Go for bright colors and avoid light pinks.
How to Apply Lipstick
Ensure your lips are soft and supple by smoothing over moisturizer before you start applying Lipstick.
Prime your lips by smoothing them with foundation, using a makeup sponge so you reach every tiny crevice on the surface.
Dust over the top of the foundation with a light dusting of your usual face powder, to help you rLipstick stay put for longer.
Rest your elbow on a firm surface and carefully dwar an outline using a lip pencil. So it does not drag you skin, it may help to warm it slightly in your palm. Start by defining the cupid's bow on the upper lip. Finish by completing the edges of the outline to the upper lip.
Use a lipbrush to fill in the outline with lipstick, ensuring you reach into every tiny crevice on the surface. Open your mouth to brush the colour into the corners of your lips.
You will help your lipstick last longer if you blot over the surface with a tissue. It will also give an attractive, semi-matte finish to your lips. Reapply to help a longer lasting finish.
Makeup kit essentials for applying lipstick properly
The essential items for applying lipstick properly is having the right shade of lipstick handy with a lip brush, lip base/balm, lip liner and gloss, depending on individual taste.
A lip liner defines the lips and prevents lip color from bleeding, giving it durability. They are available in pencil form and should be matched with the shade of lipstick used.
Gentle brushing around the lips with a soft toothbrush helps to exfoliate dead cells around the mouth area and give a clear, defined shape to the lip line.
Applying a touch of foundation/lip base onto the lips helps lipstick stay on longer and a neutral or lipstick matched liner used to outline the lips after this. The lip liner must be started from the center of the upper lip, drawn into a line towards each corner and follow the edge of the natural lip line.
The color can be filled over the lips with a lip brush in slow, deliberate strokes and lipstick that has a formulation for transfer-resistant color stays for a longer time.
If the lip pencil is chilled in the fridge for a few minutes before application, it glides on smoothly and the outlining of the lips is easier.
Lip conditioners used in lipsticks give it longer staying powder and are ideal for party wear or all daywear too, while keeping the lips moist and nourished for hours.
After the first application is over, the lips must be stretched and the liner repeated lightly again, blotted with a tissue and lip color re-applied with a lip brush for a no-budge, no-smudge, luscious lip wear.
Making the mouth round as an 'o' prevents lip color from spreading onto the teeth.
Liners and gloss are best avoided for a lip that is too full, but just a hint of lacquer brings a glow to the face.
Lipstick Tip Submiited by Visitors
Go over your lipstick with an ice cube for lasting results.
When applying lip gloss, or lipstick, apply lip balm or chapstick first.
To make lips pink take lip balm and brush with softly to your lips.